• Home
  • About Tsoniki Crazy Bull
  • Blog Posts
  • Podcasts
  • Crafty Quickies
  • Craft Gift Ideas

Native Woman Sews, Crafts, Writes, and More

Home » Sewing/Quilting » Page 2

How To Design Fabric

April 9, 2015 by Tsoniki Leave a Comment

Have you seen this awesome class on fabric design over on Creative Bug? Every part of the class has now been released so you can have a seat and watch some amazing teachers walk you through the fabric designing process. This is stuffed full of really great information, my favorite is episode 3, designing digital repeats.

Episode three is actually broken up into four parts – designing in photoshop, designing in illustrator, and creating repeats in each of the programs. I’m happy to see both of these programs in use because I have both and I’m trying to decide which to use for what purpose.

Technology has made so much available to us as creative people, as artists, and I am excited to see what I can come up with after watching the rest of the series! I’m really interested in working on my own designs and if you want to learn, check out the creativebug class now.

Filed Under: Crafty Business, Inspiration, Sewing/Quilting

Bee Europa April Queen Selvedge Block

April 2, 2015 by Tsoniki Leave a Comment

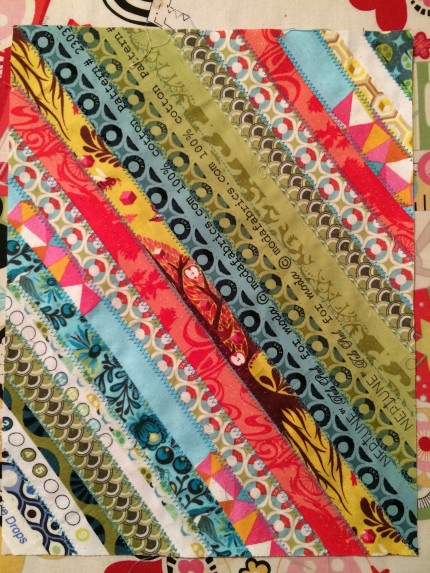
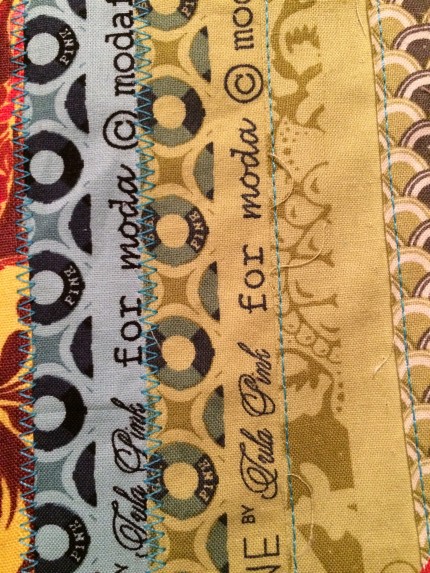
I decided it was time to get my selvedges used so I picked a selvedge block to have my bee mates in the Bee Europa group to make for me. I am super excited! When I had this idea, I made three blocks myself quickly. We won’t talk about the fact that for two of them I used foundation paper to piece the selvedges. Yeah, that will have to be ripped off at some point and I’ll have to figure out how to still use it. Or maybe I’ll have to start over with those ones, we’ll see. Anyway here is a block I made as an example. I’ve trimmed the edges so nothing is hanging over.

2015-04-01 20.57.15

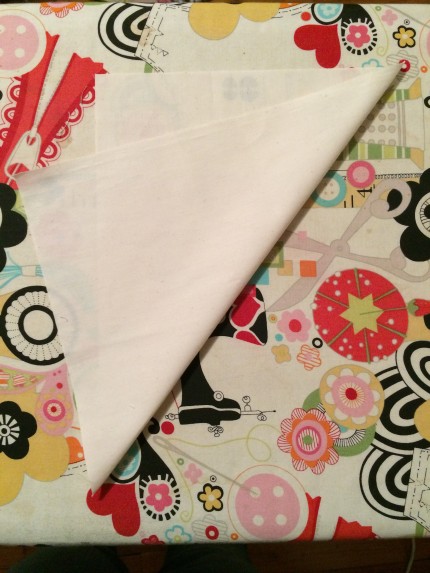
I am sending a piece of backing fabric that is 8.5 x 11 inches in size. To make this block simply fold the fabric to get a crease from one corner to the opposite corner, like this:

2015-04-01 20.59.45

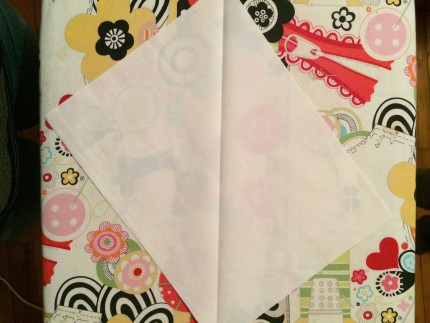
Pressing the fabric will be enough to give you a starting point. Take any selvedge that is long enough and line up on edge alone the crease. I used a few dabs of glue to keep it in place. Once that first center (or off-center as it is) selvedge is ready, it’s easy to build on the rest of them. And don’t worry about a perfect straight line from corner to corner, it’ll work out. You can see that the line doesn’t touch the corner in the second photo.

2015-04-01 21.00.12

2015-04-01 21.03.14

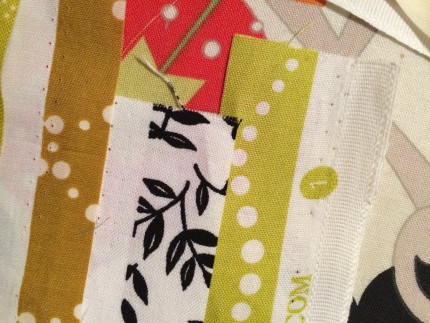
The first selvedge is held with glue, and depending on the fabric you are using, lay the next one on top or tuck it under with a small seam allowance. I’ve used both a zig zag and a straight stitch to secure the selvedges in place.

2015-04-01 20.57.30

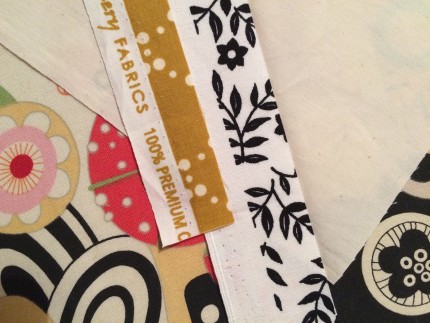
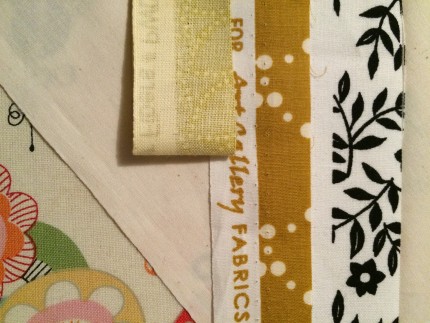
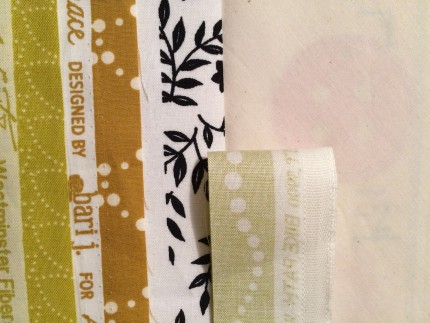
These are not sewn down, but I just wanted to show how to do the layout. I don’t want a quarter inch seam allowance as that would cover up the fabric info, which is an element to using the selvedges in a project. The first picture shows the art gallery fabric laying on top of the black and white, and then the next fabric laying on the art gallery.

2015-04-01 21.03.39

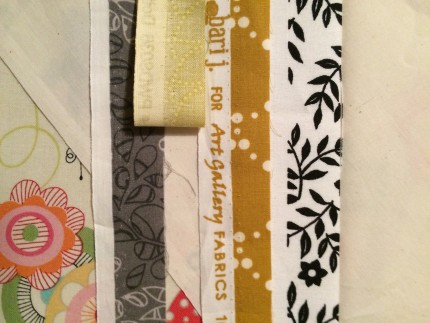
Here you can see that I tucked the grey fabric under the folded fabric. I did that because the words are printed so low on the selvedge that any fabric laying over it would cover the text. Any stitches used will also cover up the text, but less so.

2015-04-01 21.04.14

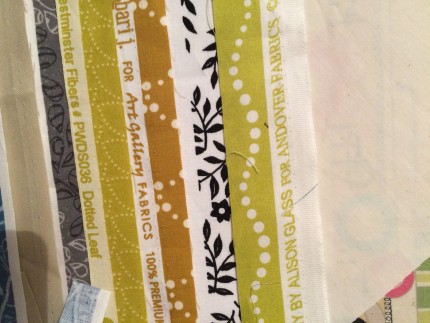
Here is an example of this block as I moved the other direction and covered up the black and white that is the starting selvedge.

2015-04-01 21.04.54

Here is this fabric lifted up to show the seam allowance.

2015-04-01 21.05.02

And that same fabric tucked under the fabric.

2015-04-01 21.05.21

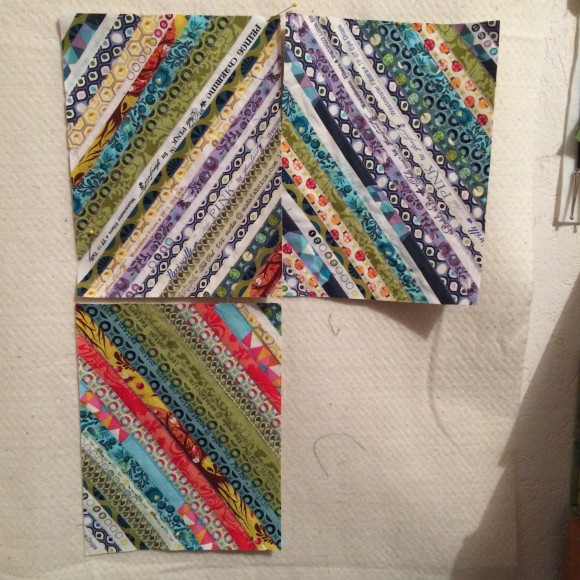
Overall I think these are simple blocks to make. Here are the three that I made, this shows the look I am going for when these are finished!

2015-04-01 22.12.25

For my bee block, I am fine with a decorative stitch as long as it catches the fabric well. I’ve used a wider variety of decorative stitches when I make a pincushion with selvedges and I am unsure as to how well they would hold up in a quilt that could potentially be washed regularly, but I am not against something that you think looks good.

I am also fine with not using white or neutral thread, I used a bright turquoise in the block I shared here, any thread that goes with the fabrics is fine with me.

I prefer that a piece of selvedge that shows the text or the color circles to be shown.

Working with selvedges can feel a bit fussy because sometimes they aren’t totally straight, usually this happens with solids versus print fabrics. I tend to use smaller pieces of these in a corner instead of one of the center pieces as they are too wavy to control. The smaller piece can be straight.

The foundation fabric can be used as a guide to trim the block.

Filed Under: Sewing/Quilting

Charm Dash Blog Hop

March 25, 2015 by Tsoniki 2 Comments

Today I am sharing a baby quilt that I made using the Charm Dash quilt pattern, which is a new pattern from Ms. Midge! You can get the pattern at Craftsy and Etsy and right now it’s on sale!

This is a great quilt to use your charm packs, of which I have many to use. I’m sharing a lot of pictures so I hope you enjoy them! This is my stop on the Charm Dash Blog Hop.

quilt

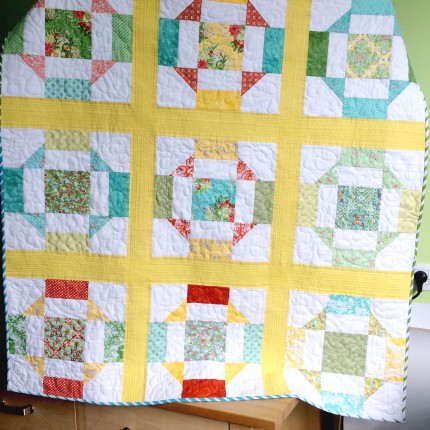
I started the quilt quickly, deciding I want to use the Flora charm pack and make a baby quilt, this used nine blocks. I have a lot of baby quilts to make and this one is going to my son’s first preschool teacher. She had a little girl recently and I can’t wait until we can give this to her!

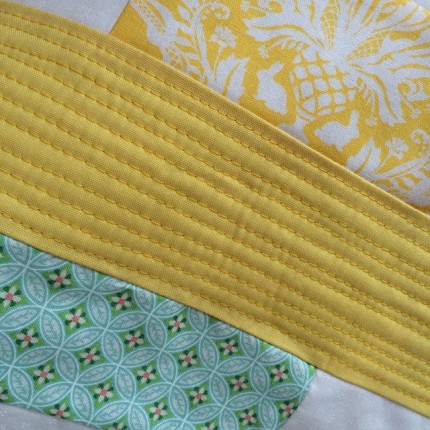
I decided to set the blocks apart and use a sashing instead of putting borders on it. I quilted the sashing in straight lines and love how it looks. This is definitely a favorite way to quilt, even if it takes a lot of thread and of course time.

Quilting

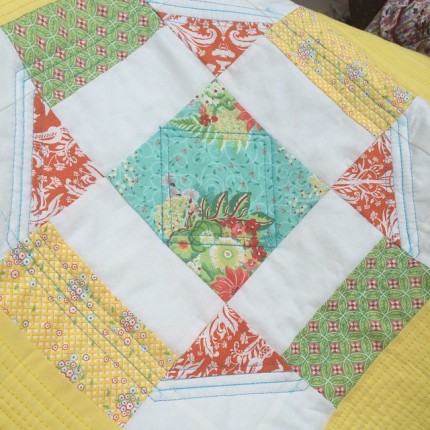
After that, I had to decide how to quilt the blocks. I used a turquoise thread and did some straight lines, and as much as I loved the design, it was too bright for me. After looking at it for several days, I tore the quilting out. Maybe I would have left this in if I used a neutral thread.

block quilting

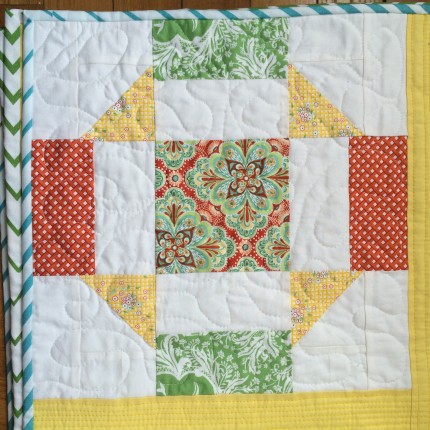
Finally, I quilted the blocks with an all over stipple with white thread.

stippling

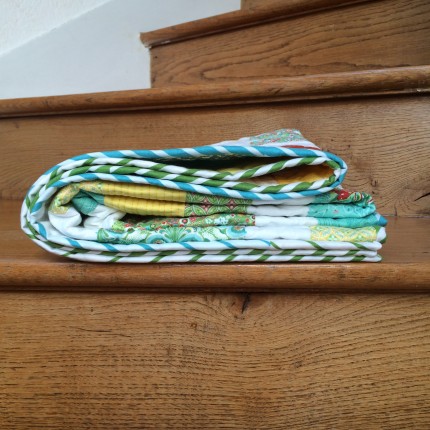
And yep, I used two fabrics for the binding. They are from the same line though, so they coordinate well.

full quilt

This quilt is beautiful. I love the quilting, the blocks came together really easy, the sashing was a great choice, and I just think it’s a great pattern. Definitely head over to Craftsy (I admit this is my favorite place to buy patterns since they hold your patterns for you in case you end up deleting them or forgetting where one was saved) and make a quick purchase. And I used one charm pack so this is also an inexpensive quilt to create as well. I used some of the charms and added to the backing.

bloghopbutton

Friday 13th March – Sarah Goer – Things I Make

Monday 16th March – Linden Vine – Vinelines Quilting

Wednesday 18th March – Crystal McGann - Raspberry Spool

Friday 20th March – Anita LaHay - Day Dreams Of Quilts 

Monday 23rd March – Progress Report - Ms Midge

Wednesday 25th March – Tsoniki Crazy Bull –  Me Being Crafty – you are here!

Friday 27th March – Tisha Nagel  –  Quilt Therapy

Monday 30th March – Progress Report - Ms Midge 

Wednesday 1st April – Kathy Gordon –  Kwilty Pleasures

Friday 3rd April – Angie Wilson –  Gnome Angel 

Monday 6th April –  Roslyn Russell - Sew Delicious

Wednesday 8th April – Abby Rudakov - Things For Boys

Thursday 9th April – Final Post and Linky open  – Ms Midge


Filed Under: Sewing/Quilting

Flash Sale – Craftsy

February 27, 2015 by Tsoniki 1 Comment

I’ve spent the week sick and taking care of sick kids. The days blended into each other, I didn’t publish my podcast, and we had doctors come to the house twice. We are finally, finally, on the mend. I’m not sure if all of us have ever been sick at the same time, so this week has been a test for sure.

The podcast will be back next week, and for now – enjoy a flash sale at Craftsy! Up to 70% off quilting kits and supplies. I may need a couple to get some new inspiration.


Craftsy

Filed Under: Fun Links, Sewing/Quilting

Scrappy Flying Geese

December 15, 2014 by Tsoniki 1 Comment

craftyquickiemake

Ohhh this is such a good idea! I love being able to use up scraps (I started over with my scraps after I gave away an entire luggage full of scraps to the parent group at school) and flying geese are so fun to work with. Look at this tutorial that Heather over at House A La Mode has created for how you can make scrappy flying geese blocks. I have some paper already cut into squares so I am going to sew a few together and see what I can come up with! This is a great scrap project.

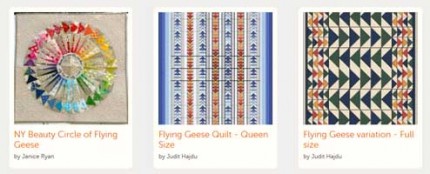
Use your flying geese to make one of these flying geese quilts from Craftsy.

CraftsyFlyingGeesePatterns

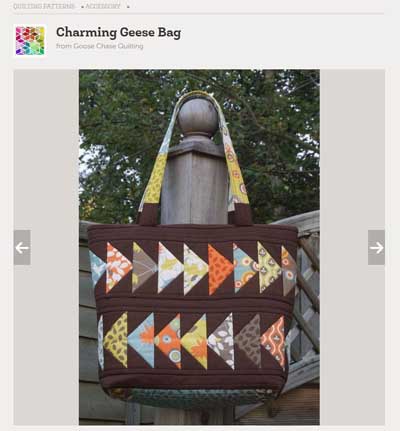
Or this beautiful geese bag! I love the flying geese going in opposite directions.

CraftsyGeeseBag

Filed Under: Crafty Quickie, Sewing/Quilting

  • « Previous Page
  • 1
  • 2
  • 3
  • 4
  • …
  • 17
  • Next Page »

Instagram

Read More Here

  • Craft Books
  • Craft Challenges
  • Craft Gift Ideas
  • Crafty Business
  • Crafty Quickie
  • Crafty Websites
  • Crochet Projects
  • Etsy Finds
  • Family
  • Finished Projects
  • Found This Week
  • France
  • Fun Links
  • Ghana
  • Holiday Crafting
  • Homeschool
  • Inspiration
  • Italy
  • Kids Crafts
  • Military
  • PinCushion Challenge
  • Podcast
  • Ramblings
  • Sewing/Quilting
  • Tutorial
  • Works In Progress

Recent Posts

  • An Update On Us in Accra, Ghana, during a Pandemic
  • What Are You Reading? Seven Books for your List
  • Shelter in Place in Ghana

Me Being Crafty 2006 - 2021 A Craft Blog Curated By Tsoniki Crazy Bull